Progress is being made swiftly and steadily towards success, I can start to see light at the end of the robotic tunnel, even if at the moment it is only a glimmer visible in the very corner of my eye. None the less a glimmer it is, I shall cling to it. Every part that goes onto the robot arm makes me a little bit more excited, however small the part is. I was thrilled when I attached the next servo horn to the required part of the arm, which is merely a process of shoving a bolt through a hole and then tightening the nut. It's like a 3000 piece Jigsaw Puzzle in 3D, lots of little pieces that make up a bigger picture, each one is equally important as the last. No part can be wrong or out of line, as that problem amplifies up the length of the arm until at the other end you find yourself nearly an inch out of line.
I liken the Robotic Arm to a very faithful dog, when it's behaving itself (and not twitching like it's stuck in an electric fence), it will follow your every command. With the robotic arm at school we (me and the technician) were trying to turn off the power switch, effectively getting the robot to shut itself down. It obeys your every command, even if that means it's virtual demise.
Anyway, down to the Knitty Gritty of the matter. What is there to update on.....?
Programming and Control:
There are a multitude of options for control, in my last post about the arm I touched on Logicator control of Robotic Arms, but over the past few weeks experiences and research have led me to encounter much better ways of doing it. Programming Languages such as "Visual Basic" and "Python" allow graphical windows to be created on the monitor of your PC. These windows are much like any other program such as word, except that they can have buttons and sliders on them that when pressed or moved send movement commands to the robotic arm. With knowledge of how to program for servo control in one of these languages you can access a multitude of possibilities, such as recorded positioning and much more accurate control. It's amazing how far learning another language takes you, regardless of whether it be computing or MFL (Modern Foreign Languages).
Construction:
This is the area of the Robot Arm where ground has really been made, the base is complete and ready to accept the circuit board. The top panel is cleverly screwed down to the bottom box so that the user can easily access the circuit board inside, as well as completely take off the main mechanism of the robot arm, leaving a box with just the circuitry in. This is done by gluing pillars into two of the corners of the box, after a few calculations and sketching on the top panel you can line up the lid with the pillars so that when you drill a pilot hole through you go through the lid and into the pillar. You then drill a clearance hole through the lid and countersink it so that the screw heads are flush with the lid surface. Thus creating a smooth surface that no one can hurt themselves on, that can also be removed.
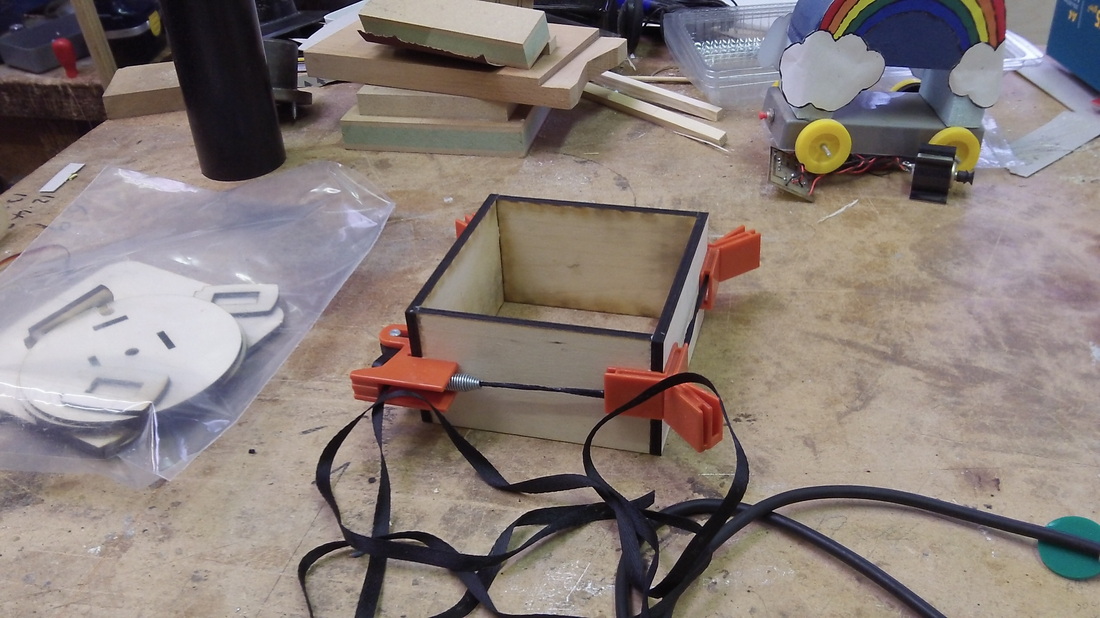
The rotary section at the bottom of the arm has been attached to the base, it's just less than a millimeter off of touching the lid of the base, meaning that it can rotate freely but won't lean to much when the arm is moving!
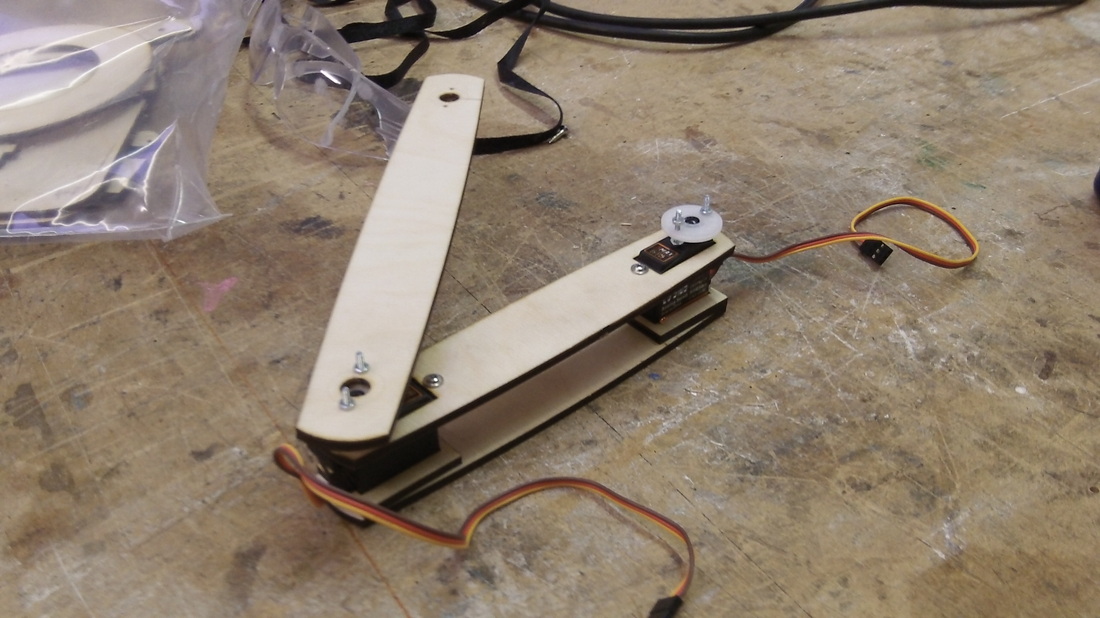
I have glued together the central section of the arm and have attached the lower shoulder section to it's corresponding servo. I was talking about precision earlier, and the central section is probably the best example of this in the whole project. The center of the servo horn has to be perfectly lined up with the hole for the pivot point on the other side. These two halves have to be glued together, meaning that I spent a painstaking hour lining up the central section and then G Clamping it into place so it could dry without slipping out of alignment. Happily I can report that it all perfectly lines up, so I was successful there!
I have glued together the central section of the arm and have attached the lower shoulder section to it's corresponding servo. I was talking about precision earlier, and the central section is probably the best example of this in the whole project. The center of the servo horn has to be perfectly lined up with the hole for the pivot point on the other side. These two halves have to be glued together, meaning that I spent a painstaking hour lining up the central section and then G Clamping it into place so it could dry without slipping out of alignment. Happily I can report that it all perfectly lines up, so I was successful there!
Once the base and the central section are attached to each other the arm will be about two thirds done in terms of the mechanical side of things. I still have to solder up the control board, but this is small compared to the amount of soldering I have had to do in the past and thus it will not take too long relative to the amount of time already spent on this project!
That about finishes up for this post but I have an announcement to make before I leave you to the rest of your day. I am making a time lapse of the whole Robotic Arm build process, something that I have as of yet not really seen done before. I will be uploading this too YouTube when it is complete (I still have to finish the arm after all), it's going to be roughly 15 - 20 minutes long so don't watch all of it, skip along if you just want to see a brief overview.
Here's a little taster to get you in the mood!
Another Long one, Im off to relax ready for more Roboteering Tomorrow!
P.S I would like to say thank you Diane Nicholls for the tweet, it really is appreciated!
P.S I would like to say thank you Diane Nicholls for the tweet, it really is appreciated!
